

Products And Tools Needed
Flexible solar panels
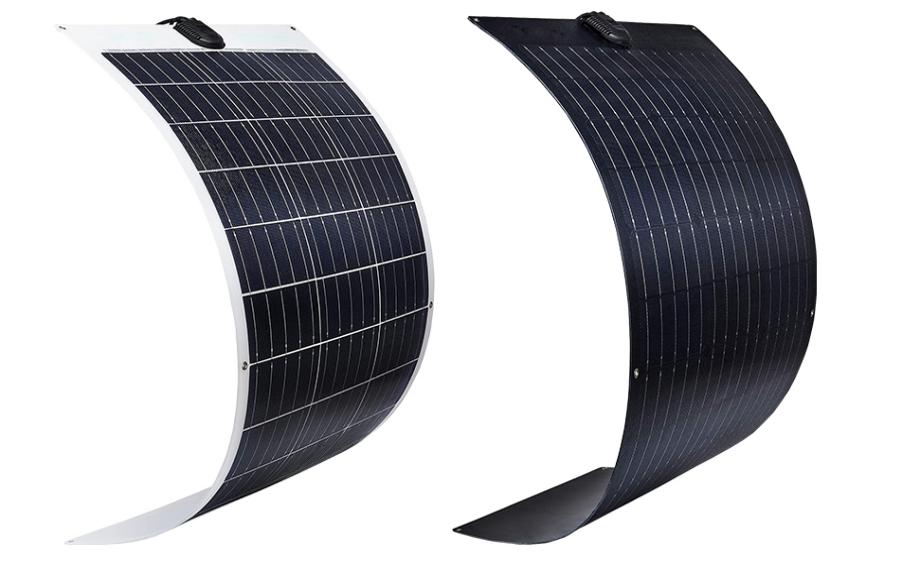
Choose the flexible solar panel datasheet that you want:
PERC HIGH-EFFICIENCY FLEXIBLE MONO SOLAR PANELS SPECIFICATIONS
| No. | Power (W) |
Matrix (solar cell) |
Vmp (V) |
Imp (A) |
Voc (V) |
Ics (A) |
efficiency (%) |
Dimension(mm) Junction box Back orFront |
Thickness (mm) without hack glue |
Weight about(kg) without back glue |
| 1 | 55W | 182 solar cell(4*2) |
8.96 | 6.13 | 10.75 | 6.63 | 23-24,5% | BackL*W:765*395 From L*W:785*395 |
3mm | 0.95 |
| 2 | 85W | 182solar cell(4*3) |
13.44 | 6.33 | 16.12 | 6.83 | BackL*W:765*585 From L*W:785*S85 |
1.67 | ||
| 3 | 115W | 182 solar cell(4*4) |
17.92 | 6.45 | 21.50 | 6.95 | BackL*W:765*65 Fron L*W:795*765 |
2.22 | ||
| 4 | 140W | 182 solar cell(5*4) |
22.40 | 6.27 | 26.88 | 6.75 | BackL*W:960*765 From L*W:980*765 |
2.75 | ||
| 5 | 155W | 166 solar cell (9*3) |
30.24 | 5.13 | 36.28 | 5.56 | Back L*W:1580*550 Front L*W:1600*550 |
3.25 | ||
| 6 | 180W | 182 solar cell(5*5) |
28.0 | 6.44 | 33.60 | 6.94 | Back L*W:960*960 From L*W:980*960 |
3.50 | ||
| 7 | 215W | 182solar cell (6*5) |
33.60 | 6.40 | 40.32 | 6.94 | Back L*W:1140*960 Front L*W:1160*960 |
4.12 | ||
| 8 | 250W | 182 solar cell(7*5) |
39.20 | 6.40 | 47.04 | 6.94 | Back L*W:1325*960 Front L*W:1345*960 |
4.75 | ||
| 9 | 285W | 182 solar cell(8*5) |
44.80 | 6.40 | 53.76 | 6.94 | Back L*W:1510*960 Front L*W:1530*960 |
5.35 | ||
| 10 | 300W | 166 solar cell(9*6) |
30.0 | 10.10 | 36.0 | 10.50 | BackL*W:1550*1050 Front L*W:1570*1050 |
6.02 | ||
| 11 | 320W | 182 solar cell(9*5) |
50.40 | 6.35 | 60.48 | 6.85 | Back L*W:1695*960 Front L*W:1715*960 |
6.10 | ||
| 12 | 355W | 182 solar cell(10*5) |
56.0 | 6.35 | 67.20 | 6.85 | Back L*W:1880*960 Front L*W:1900*960 |
6.75 | ||
| 13 | 430W | 182 solar cell(10*6) |
67.20 | 6.40 | 80.64 | 6.91 | Back L*W:1880*1140 Front L*W:1900*1140 |
8.05 | ||
| 14 | 460W | 210solar cell(8*6) |
53.76 | 8.68 | 63.6 | 9.11 | BackL*W:1735*1300 Front L*W:1750*1300 |
8.50 | ||
| 15 | 500W | 182 solar cell(10*7) |
78.40 | 6.38 | 94.08 | 6.37 | BackL*W:1880*1325 Front L*W:1900*1325 |
9.25 |
Back Glue:
- Flexible solar panel with back glue on the back of the solar panel
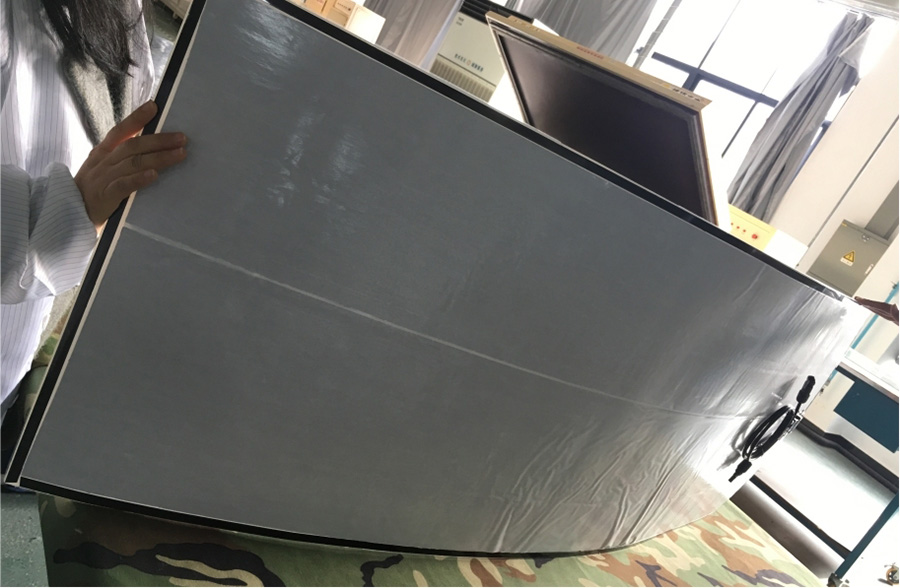
- Separated back glue from the flexible solar panel
Break the adhesive lines in the middle of the solar panel with a gap of 70-100 mm. This will even out the pressure and allow for additional escape routes for air and water if the edges of the solar panel are not sealed at the end of the installation.
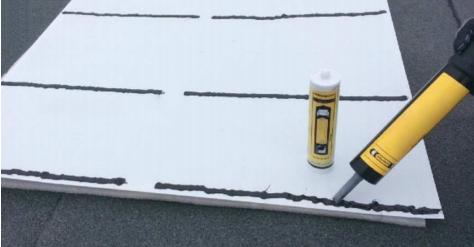
The adhesive lines can be as close to each other as required (the number of lines depends on the strength of your chosen adhesive), but a minimum gap of at least 70 mm between lines is recommended. In general, for most plastic/fibreglass/metal surfaces and a good quality adhesive, a gap of 100 – 150 mm between parallel adhesive beads would form a strong bond.
Steps for Mounting Flexible Solar Panels on a Van
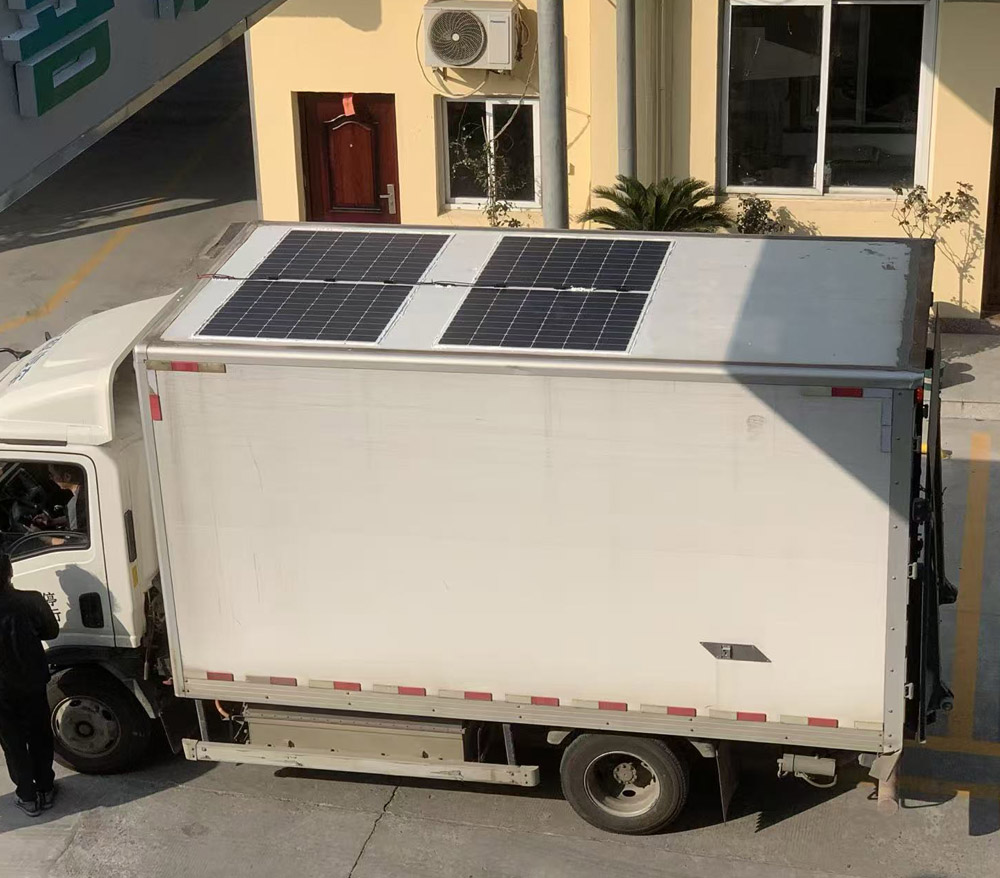
Step 1: Planning and Measurement (The Blueprint)
Before you buy anything, you need a plan.
Calculate Your Power Needs:
List all the devices you want to run (fridge, lights, laptop, phone charger) and estimate their daily power consumption in Watt-hours (Wh). Add a 20-30% buffer.
Choose Your Panels:
Based on your power needs, decide on the total wattage of panels you require. Flexible panels come in various sizes and wattages (e.g., 50W, 100W, 200W,250W,300W etc).
Design the Layout:
Measure your van’s roof and sketch a layout. Try to fit the panels with minimal gaps. You might have to curve them slightly around the roof’s ribs.
What a picture would show:
A piece of graph paper with a rough outline of your van’s roof. Rectangles representing the solar panels are drawn on top, showing how they will fit.
Step 2: Choose Your Mounting Method
Flexible panels are typically mounted in one of two ways:
Adhesive Mounting (Most Common):
Using high-strength, weatherproof double-sided tape (like 3M VHB tape). This is a permanent, non-penetrating solution.
What a picture would show:
A roll of 3M VHB tape and a tube of solar panel adhesive.
Mechanical Mounting:
Using specialized clamps, brackets, or a rail system that grips the edges of the panel without needing to adhere the whole panel. This allows for removal but requires more hardware and potential roof penetrations for wiring.
What a picture would show:
A metal bracket clamped onto the corner of a flexible solar panel.
For this guide, we’ll focus on the adhesive method.
Step 3: Prepare the Van’s Roof
A clean, dry surface is critical for a strong bond.
Clean the Roof:
Thoroughly wash the section of the roof where the panels will go. Remove all dirt, wax, and debris. Then, wipe the area with isopropyl alcohol and a clean rag to remove any residue. Let it dry completely.
What a picture would show:
A person on a ladder, wiping the van’s roof with a cloth soaked in a cleaning solution.
Mark the Positions:
Use a marker or masking tape to outline exactly where each panel will go. Double-check your alignment.
What a picture would show: The van roof with faint pencil lines marking the corners of the future solar panel installation.
Step 4: Apply Adhesive and Mount the Panels
This is the core installation step.
Apply the Tape:
Peel off the backing from strips of VHB tape. Place the strips on the back of the solar panel, avoiding the areas with the junction box and cables. A common pattern is a continuous strip along the four edges and a few pieces in the center.
What a picture would show:
A close-up of the back of a flexible solar panel with strips of grey VHB tape applied.
(Optional but Recommended) Prime the Surface:
Some installers apply a thin layer of the included primer to the roof where the tape will stick. This enhances the bond.
Position and Press:
Carefully lift the panel and place it onto the marked position on the roof. Press down firmly along the entire surface, starting from the center and working outwards, to expel any air bubbles.
Secure During Curing:
Most adhesives require time to cure fully (often 24-72 hours). To ensure a good bond, use temporary clamps, bungee cords, or heavy objects to hold the panel in place while the adhesive sets. Do not drive the van during this time.
What a picture would show:
A person pressing a solar panel onto the van roof with both hands. In another shot, the same panel is held in place with small clamps and a wooden block.
Step 5: Wire the Panels Together
You need to connect the panels to a single output cable.
Connect Panels:
Most flexible panels have pre-installed MC4 connectors. You can connect them in series (to increase voltage) or parallel (to increase amperage). A series is generally preferred for long wire runs.
Run the Main Cable:
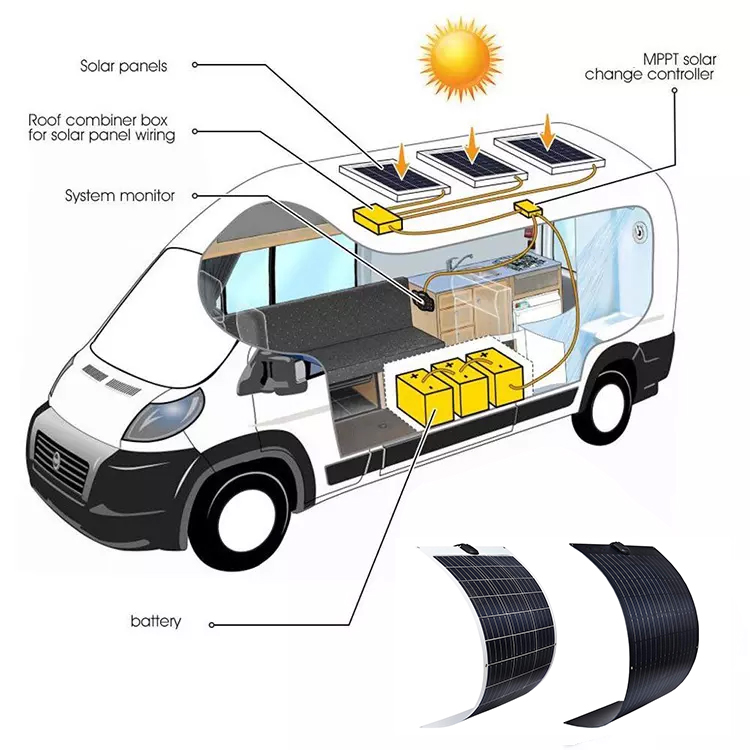
The combined positive and negative output cable from the panels needs to be run down the side of the van and into the interior, where your charge controller and batteries are located.
Seal the Entry Point:
Drill a hole for the wire to pass through. Use a waterproof gasket or a generous amount of Dicor self-leveling sealant around the wire to prevent leaks.
What a picture would show:
A close-up of two MC4 connectors being plugged together. Another picture shows a wire passing through a hole in the van’s side panel, sealed with a rubber gasket.
Step 6: Install the Electrical Components
Mount the Charge Controller:
Install the solar charge controller inside the van, in a well-ventilated area away from direct sun and moisture.
Connect to Batteries:
Connect the charge controller to your house battery bank (Lithium, AGM, etc.) using appropriately sized cables. Always use fuses!
Connect Panels to Controller:
Connect the main solar panel output cable to the charge controller.
What a picture would show:
A digital solar charge controller mounted on a plywood wall inside the van, with colour-coded wires connected to it.
Step 7: Test and Monitor
Check the System:
Once everything is connected, turn on the system. The charge controller should light up, indicating it is receiving power from the panels.
Monitor Performance:
Use the display on the charge controller to check the incoming solar voltage and current. On a sunny day, you should see the numbers rise.
What a picture would show:
The screen of a charge controller displaying “PV Voltage: 18.9V” and “PV Current: 5.2A”.
Important Safety Tips
Wear Gloves: The edges of some flexible panels can be sharp.
Follow Adhesive Instructions: Curing times and application methods vary by product. Read the manual.
Use Proper Wiring: Use marine-grade or automotive-grade wire of the correct gauge to handle the current.
Fuse Everything: Protect your batteries and wiring with appropriately sized fuses or circuit breakers.
When in Doubt, Ask for Help: If you are unsure about the electrical part, consult a professional or a knowledgeable friend. Of course, the NEWLIGHT ENERGY Team love to give an answer if you want to reach us.
By following these steps, you can successfully mount flexible solar panels and start generating your own clean energy on the road. Happy van life!
How to Mount Flexible Solar Panels on a Van Without Drilling?
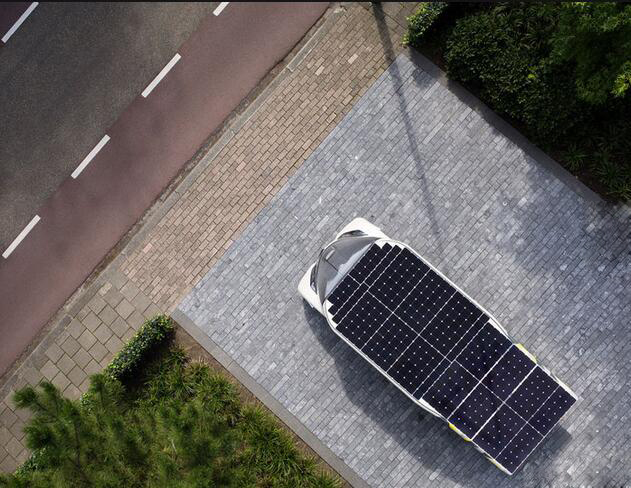
Mounting flexible solar panels on a van without drilling is a very popular approach, as it preserves the vehicle’s roof integrity and creates a clean aesthetic. The key is to use a strong adhesive or specialized non-penetrating clamps, and to find a clever way to route the wiring.
Why Flexible Solar Panels for Van Roofs?
Apply the Adhesive
Use a high-strength, automotive/marine grade double-sided tape, such as 3M VHB (Very High Bond) tape. Many solar panel kits come with specific adhesive for this purpose.
Cut strips of the tape and apply them to the back of the solar panel. Avoid covering the junction box and the area where the cables exit.
A good pattern is a continuous strip along all four edges and several smaller pieces in a grid pattern across the main body of the panel.
(Optional but recommended) Apply a thin layer of the primer that often comes with the adhesive kit to the roof where the tape will make contact. This significantly strengthens the bond.
Mount the Panel
Carefully position the panel onto the marked spot on the roof.
Press down firmly over the entire surface of the panel. Start from the center and push outwards to expel any air bubbles. Use your palm or a small roller.
Crucial: The adhesive needs time to cure and reach its full strength. This can take anywhere from 24 to 72 hours.
Do not drive the van during this time. To ensure a perfect bond, use temporary clamps, bungee cords, or heavy objects to hold the panel in place while the adhesive cures.
Alternative Method: Non-Penetrating Clamps
If you prefer a removable option, you can use specialized clamps.
How it works: These systems use metal or plastic clamps that grip the edges of the flexible panel. The clamps are then secured to the roof using small adhesive pads, suction cups, or by sitting in a track.
Pros: The panel can be removed if necessary.
Cons: It’s often bulkier, can be more expensive, and may not look as clean as a direct adhesive mount. The clamps can potentially loosen over time due to vibration.
Important Tips for a No-Drill Installation
Adhesive is Strong: Modern VHB tapes are incredibly strong and designed to withstand extreme temperatures and vibrations. When installed correctly, they are a permanent and secure solution.
Patience is Key: Do not rush the adhesive curing process. Driving the van before the bond is set will almost certainly cause the panel to fail.
Check Compatibility: Ensure the adhesive you choose is suitable for your van’s roof material (e.g., painted aluminum, fiberglass).
Weatherproofing: The adhesive itself creates a waterproof seal. For extra protection, you can apply a small dab of Dicor sealant or similar lap sealant around the edges of the panel after it’s mounted.
Weight and Aerodynamics: Be mindful that solar panels add weight and wind resistance. Make sure your roof rack (if you have one) or the roof itself can handle the load.
Conclusion
Mounting flexible solar panels on a van is a transformative project that unlocks the freedom of off-grid power, enabling true independence for life on the road. While it involves several technical steps, the process can be broken down into a clear, manageable plan.
The journey concludes with a choice of methods, each with its own merits. The adhesive mounting method, using high-strength tape like 3M VHB, is the most popular. It provides a permanent, sleek, and non-penetrating solution that preserves the van’s roof integrity, though it demands meticulous surface preparation and patience during the curing period.